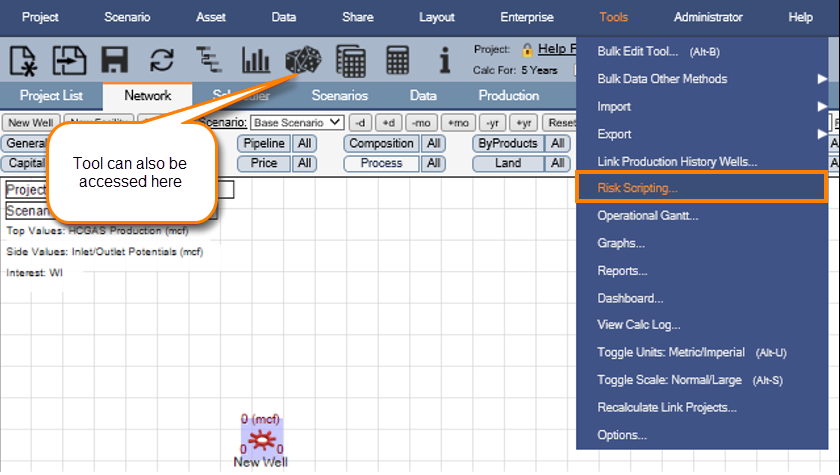
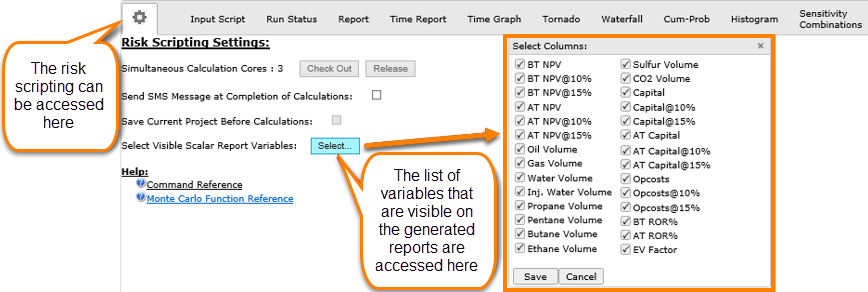
The Risk Scripting tool in Enersight allows the user to define scripts that risk specific variables in a project. The Risk Scripting tool can be accessed from the Tools tab on the top menu ribbon.
Click image to expand or minimize.
Click image to expand or minimize.
Setting up the Input Script
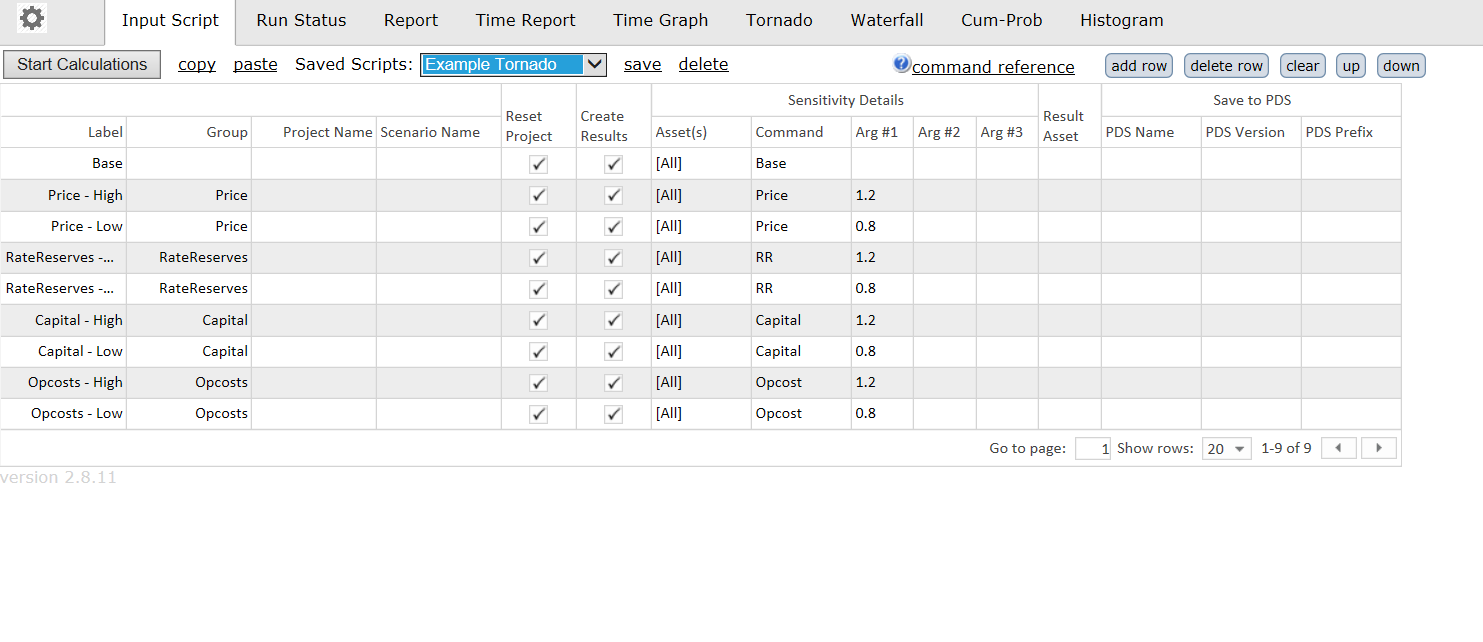
The Input Script tab allows the user to design a script to run specific sensitivities on their project. Example scripts exist for Tornado, Waterfall and Monte Carlo methodologies.
Click image to expand or minimize.
Below is a brief description for each of the columns located in the Input Script tab:
Once all of the adjustments are made to the input script, it can be saved for future use by selecting Save next to the script dropdown box.
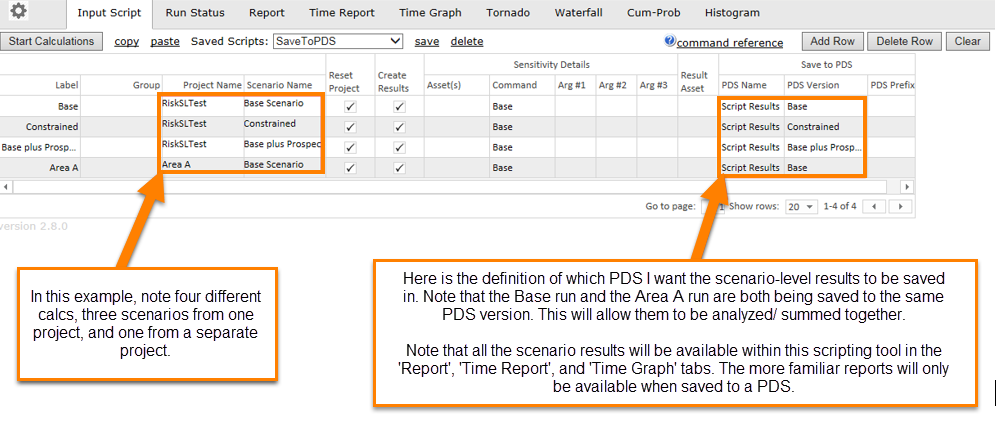
Example: Designing a Script to Write to PDS
Click image to expand or minimize.
Run Status

Click image to expand or minimize.
Outputs
There are a number of different reports that can be generated using the risk scripting tool.
Report
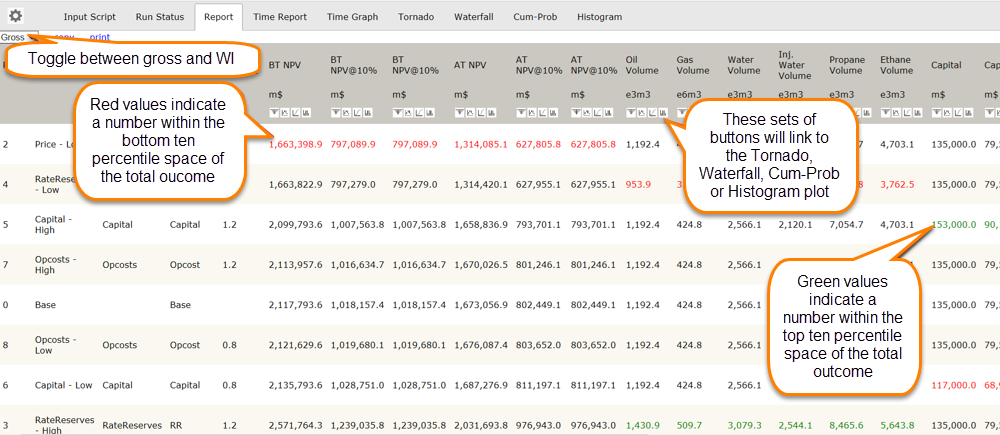
The general summary report can be accessed by clicking on the Report tab.
Click image to expand or minimize.
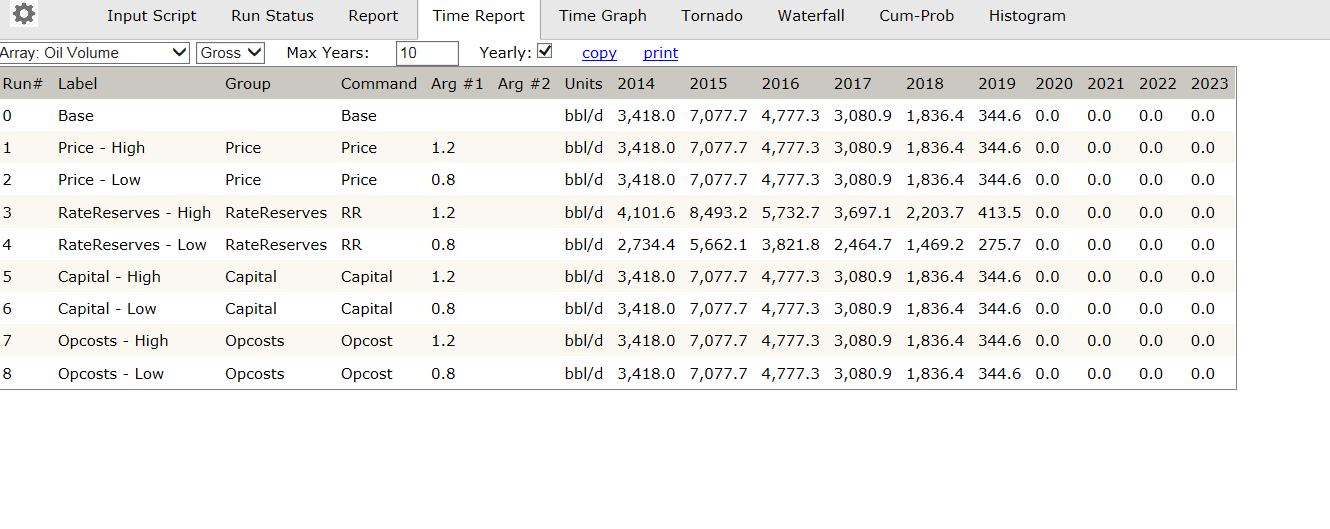
Time Report
Click image to expand or minimize.
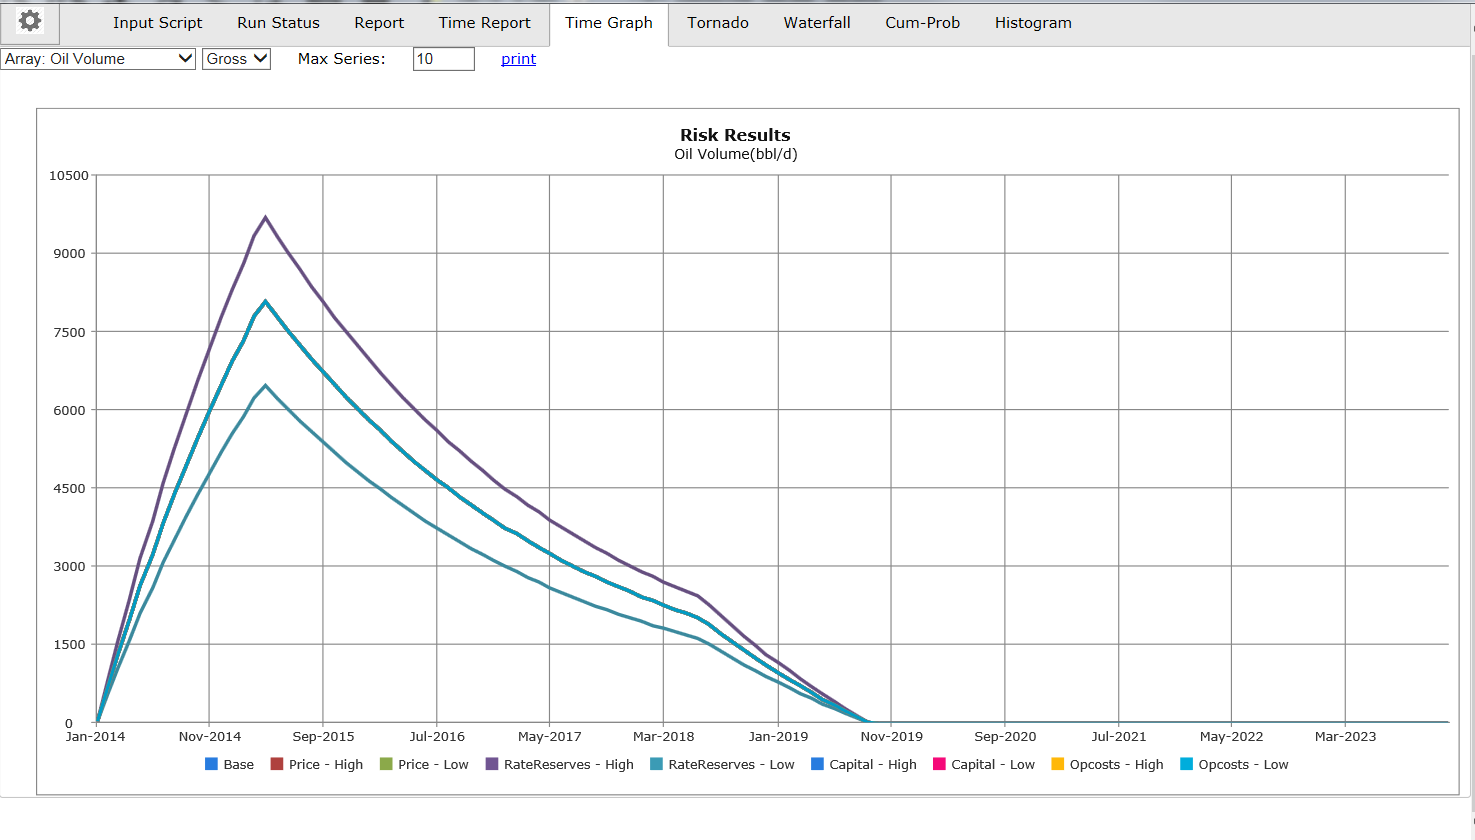
Time Graph
Click image to expand or minimize.
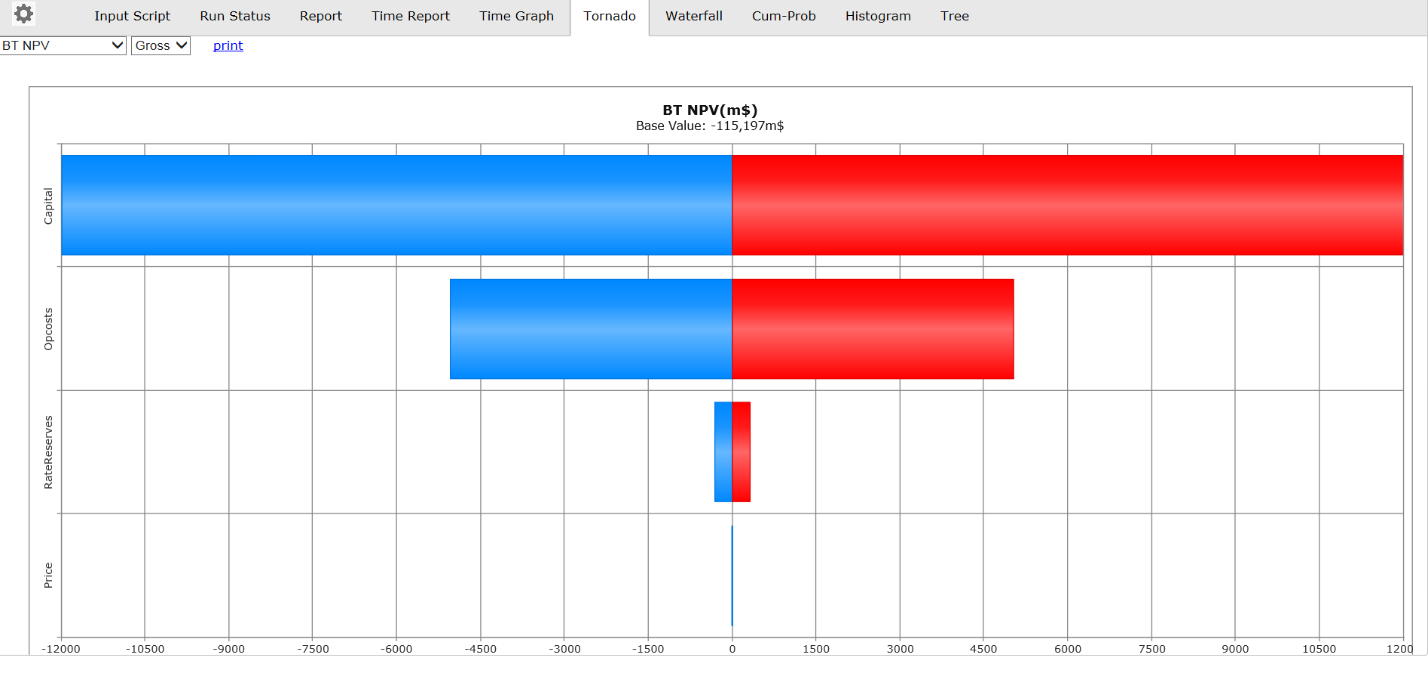
Tornado Plot
Click image to expand or minimize.
Waterfall Plot
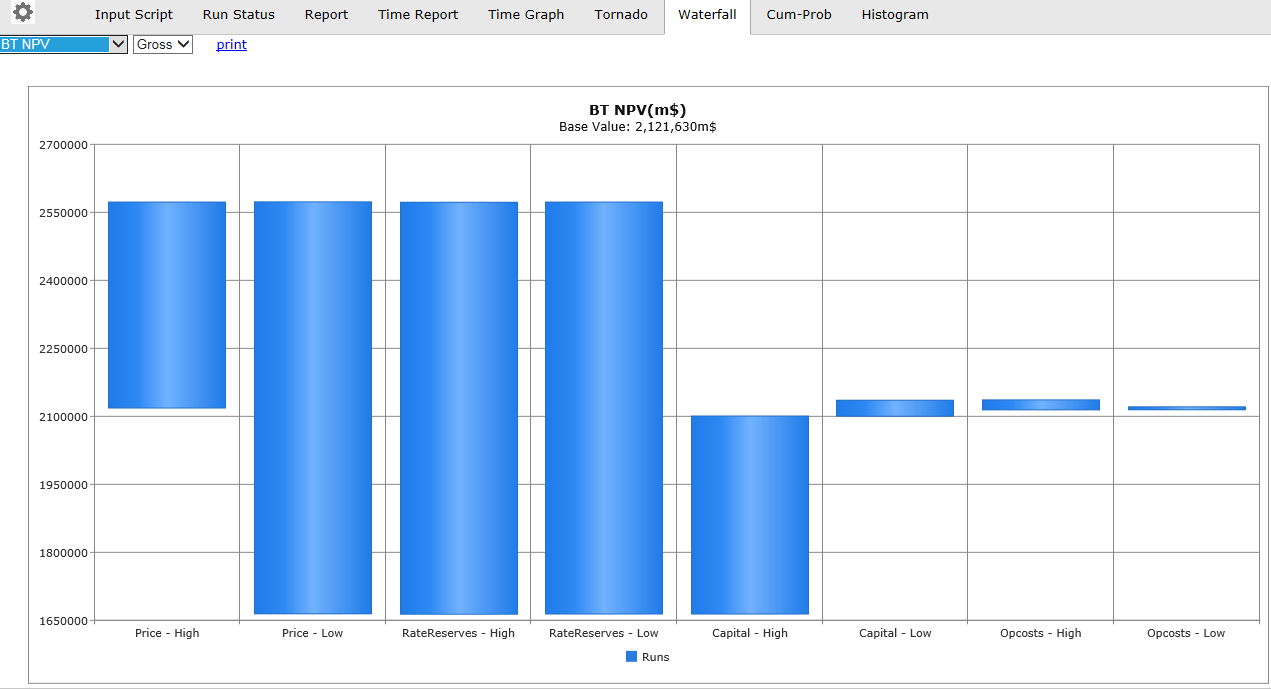
Click image to expand or minimize.
Cum-Prob
The Cum-Prob output is only valid for Monte Carlo simulations.
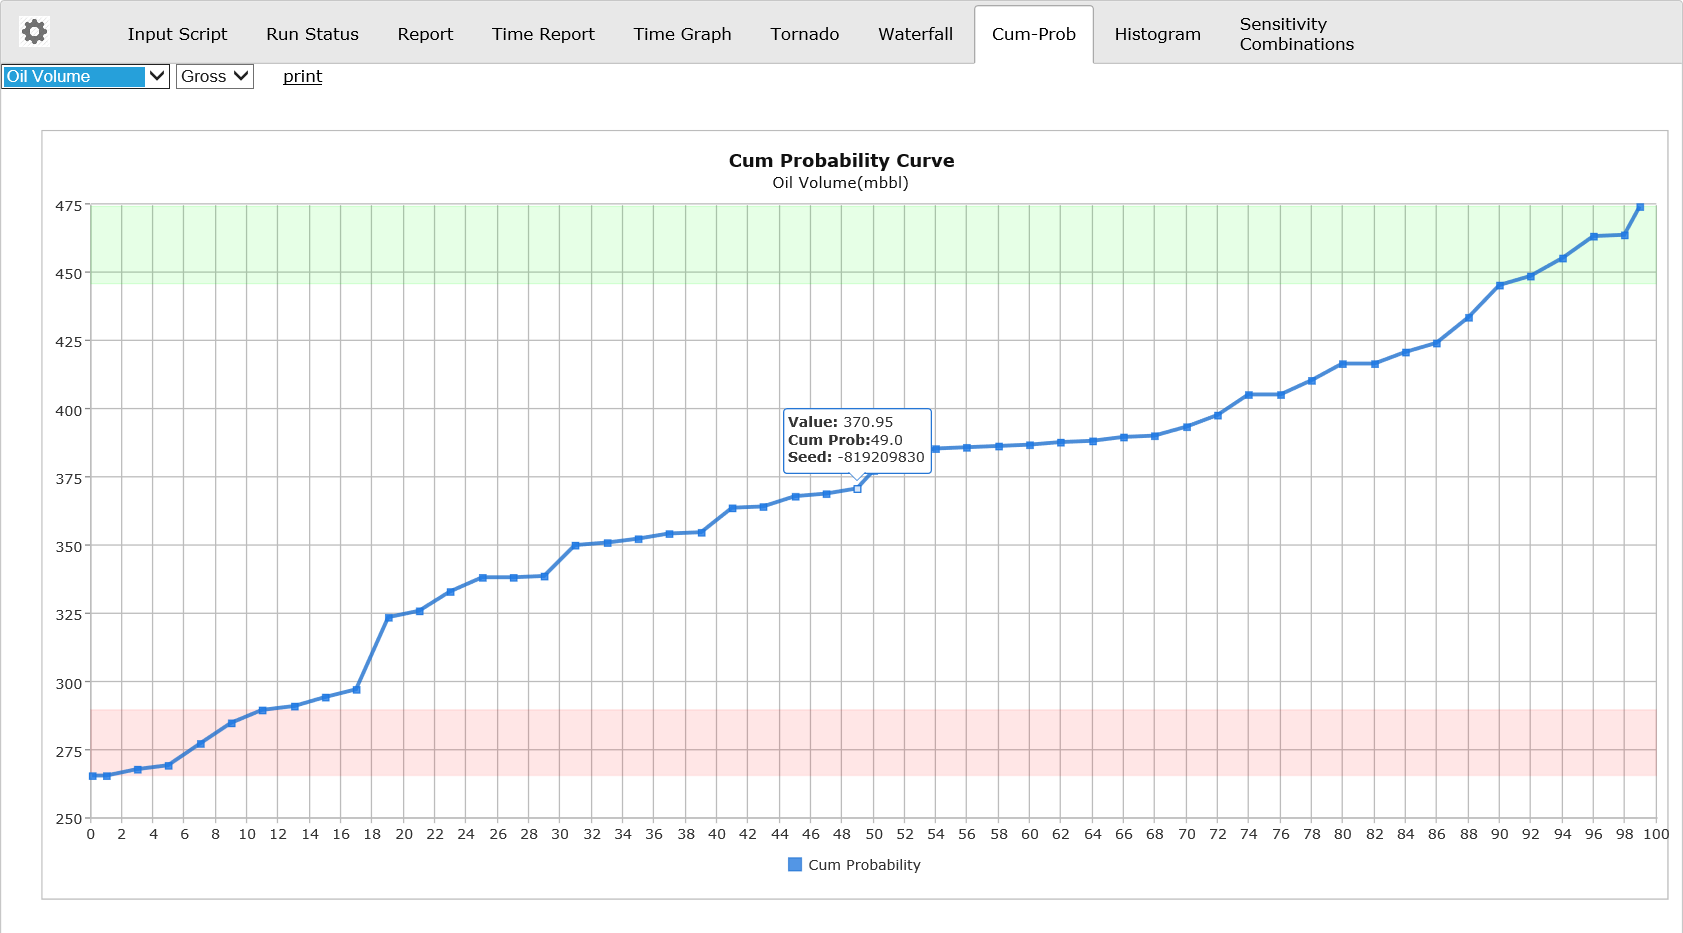
Click image to expand or minimize.
Histogram
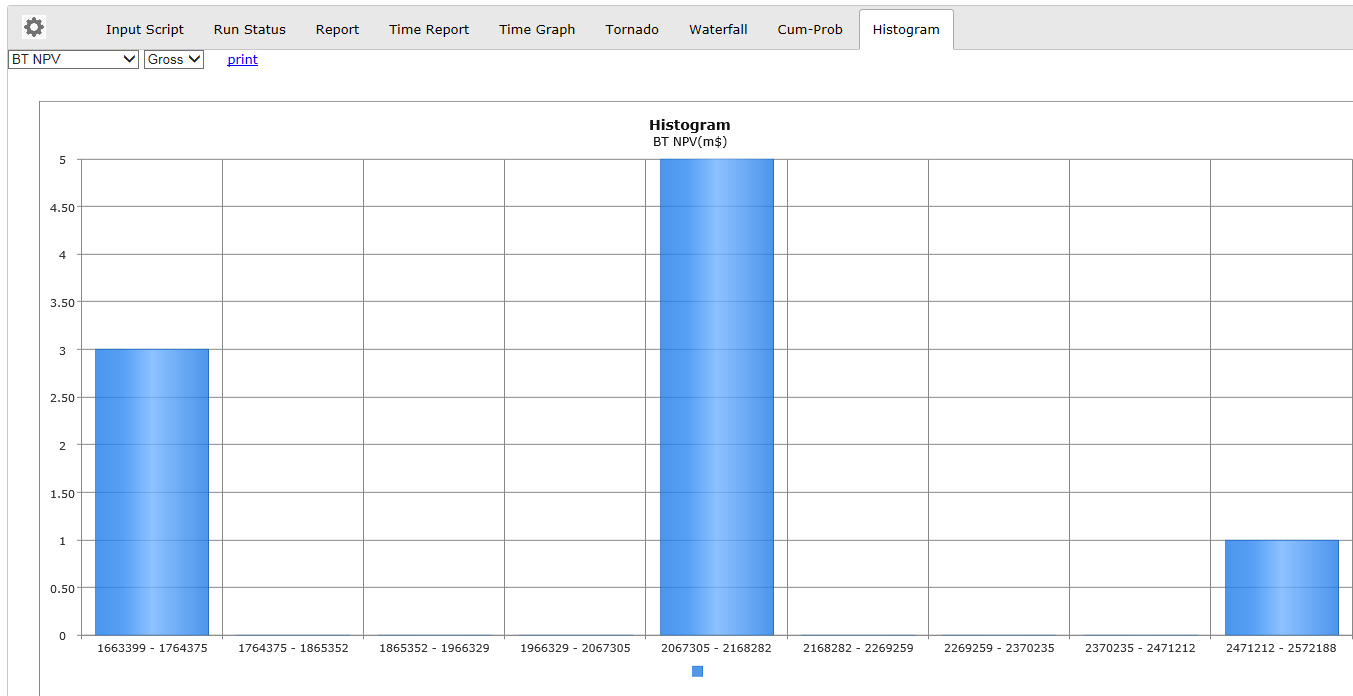
Click image to expand or minimize.
Risk Script Examples - Using Uploaded Excel Files in Scripts
In Enersight 2.17, three new scripting commands were added: DrillingProgram:WellList, Resources:ReplaceAll, and UserDataTable:Replace. All three of these allow references to Excel files that have been uploaded to the Enersight Documents library to provide a Script Scenario/Risk Script run with a different set of inputs, a different Well List, Resource Definition, or updated User Data Table values. This capability provides more flexibility in the changes that can be made to a model during a script run.
Uploading a Document
These commands rely on an Excel document that has been uploaded into Enersight using the Enterprise > Documents menu entry.
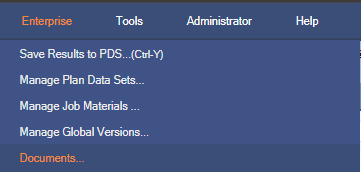
To upload Excel files that can be used in scripts, click Choose File to find your file, give it a name, and choose ScenarioScriptingInputs as the document type. Check the Public to Company Users checkbox if you want all users to be able to access this file. Otherwise only the uploader will be able to see and use it. Click Upload to add a new file to the documents library or click Upload and Replace.

WellList:Replace Example
To replace a Well List in a script run, use the command WellList:Replace. This will replace the entire well list with the definition provided in the uploaded Excel file.
Command: WellList:Replace
Argument 1: Document Name (not the file name, but rather the name in the 'Name' column of the Documents screen).
Argument 2 (optional): Drilling Program Name. Omitting the drilling program name will replace the Scenario Well List. Providing a name will replace the list just for that Drilling Program.
Argument 3 (optional): Worksheet name. You can have multiple Well Lists in the same workbook. Defaults to the first sheet in the workbook if there is no input here.

Resources:ReplaceAll Example
To replace the Resource Definitions in a script run, use the command Resources:ReplaceAll. This will replace the entire set of Resources with the definition provided in the uploaded Excel file.
Command: Resources:ReplaceAll
Argument 1: Document Name (not the file name, but rather the name in the 'Name' column of the Documents screen).
Argument 2 (optional): Worksheet name. You can have multiple Resource Definitions in the same workbook. Defaults to the first sheet in the workbook if there is no input here.

UserDataTable:Replace Example
Using the command UserDataTable:Replace, you can update the values in an existing User Data Table. Note that you cannot create new User Data Tables or append new values to an existing table using this command. All values will be replaced with those provided in the uploaded Excel file. Be aware that the Comments column must exist in your Excel file even if it is empty.
Command: UserDataTable:Replace
Argument 1: Document Name (not the file name, but rather the name in the 'Name' column of the Documents screen).
Argument 2: Name of User Data Table.
Argument 3 (optional): Worksheet name. You can have multiple User Data Tables in the same workbook. Defaults to the first sheet in the workbook if there is no input here.

